EZ-B V4 by EZ-Robot


Firmware
The original EZB, ready for ARCx
The EZ-B v4 is EZ-Robot's Wi-Fi robot controller and the board the whole EZB ecosystem is named after. Plug in servos, sensors, a camera and a speaker, then drive, program and talk to your robot from any web browser with Synthiam ARCx, or from Windows with ARC. No compilers and no firmware to write.
How the EZ-B v4 works with Synthiam: the board ships with EZB firmware already on it, so there is nothing to flash. A computer running Synthiam software connects to it over Wi-Fi (or a USB serial adapter) and sends every servo move, port read, camera frame and sound. In ARCx, the Ezb Connection robot skill makes the connection, Camera Source (ezb) brings in the camera, and the project's audio can play out of the board's speaker. We recommend ARCx: it runs on Windows, Ubuntu and Raspberry Pi and is used from any browser. ARC on Windows supports the EZ-B v4 fully as well.
What is the EZ-B v4?
The EZ-B v4 (the current revision is the EZ-B v4/2) is the main controller, the "brain", of a robot or IoT project. It is built so beginners can get a servo moving in minutes, and it has enough ports for a full humanoid. Think of it as a Wi-Fi remote control hub: it powers and controls servos, reads sensors, and streams camera video and audio to and from the computer running Synthiam software.
Inside are two ARM processors, a 120 MHz Cortex-M3 on the main board and a 100 MHz Cortex-M4 in the Wi-Fi module, handling real-time work such as servo timing, digital I/O and the video stream. The board adds 2.4 GHz Wi-Fi with an embedded web server for setup, an amplified speaker output, three I²C headers, three UARTs and a dedicated camera connector.
- Digital ports D0–D23: servos, LEDs, switches, many sensors and transmit-only serial devices.
- Analog ports A0–A7: read sensors that output a varying voltage, such as potentiometers and light sensors.
- I²C ports: smart sensors and modules that share two data wires.
- UART ports: two-way serial devices such as smart servos, GPS units and other microcontrollers.
- Camera port: for the EZ-Robot Camera (v2).
- Wi-Fi: connect directly to the board, or have it join your own network.
EZ-B v4 at a glance
| Type | Wi-Fi robot and IoT controller running EZB firmware |
|---|---|
| Maker | EZ-Robot |
| Processors | 120 MHz ARM Cortex-M3 (main) + 100 MHz ARM Cortex-M4 (Wi-Fi) |
| Connection | Wi-Fi 802.11 b/g/n 2.4 GHz (access point or client), or USB through a serial adapter |
| Ports | 24 digital, 8 ADC, 3 I²C, 3 UART, camera, speaker |
| Power | 4.5–16 V DC, typically a 7.4 V 2S LiPo |
| Synthiam uses it for | Servos, driving, sensors, camera, speech and sound for any robot |
| Website | ez-robot.com |
What you can do with the EZ-B v4 in Synthiam
Every robot skill that uses an EZB works with the EZ-B v4. Add skills to a workspace, pick a port, and the robot responds.
Servos and animation
Up to 24 servos on D0–D23. Move one with the Servo skill, build poses and gaits with Auto Position, or animate on a timeline with Servo Animation.
Driving
Wheels or tracks through an H-bridge with the Hbridge Movement Panel, or continuous rotation servos with the Continuous Rotation Movement Panel. Drive with an on-screen joystick or a gamepad.
Camera and vision
The EZ-Robot Camera streams through the board into Camera Source (ezb), ready for Face Tracking, Color Tracking, glyphs, object training and recording.
A voice on the robot
Speech and sounds can play from the robot's own speaker. Record your voice with Microphone Playback (ezb), play files with the Sound Board, and move a jaw with Talk Servo.
Sensors
Watch analog sensors and battery voltage with Adc Monitor, buttons and bumpers with Digital Monitor, and the EZ-Robot RGB Eyes over I²C with Rgb Eyes Animator.
Smart servos
Wire Dynamixel servos to a hardware UART (or D5) and drive them with the Dynamixel Servo Driver. Other serial servo drivers in the store use the UARTs the same way.
Programming
Blockly for beginners, JavaScript and Python for everyone else. Scripts move servos, read ports and talk to UART devices on any board in the project.
AI
ARCx is an MCP server, so AI agents such as Claude can see through the camera, move servos and program the robot. Conversational and vision AI skills run on top of the same EZB.
Custom UI and remote access
Design touch-screen control panels with Custom UI, and drive the robot from anywhere or invite others to use it with Exosphere.
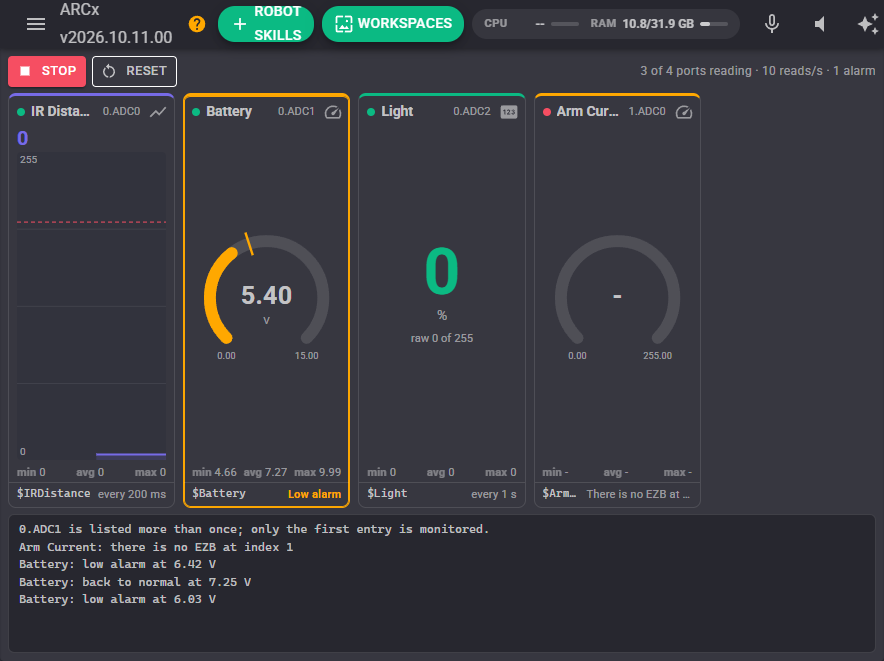
A project can use several EZBs at once, for example an EZ-B v4 for the head and arms and another for the drive base. Each board gets an index (EZB 0, EZB 1, ...) in the Ezb Connection skill, and every robot skill and script picks a board by that index.
Where everything plugs in
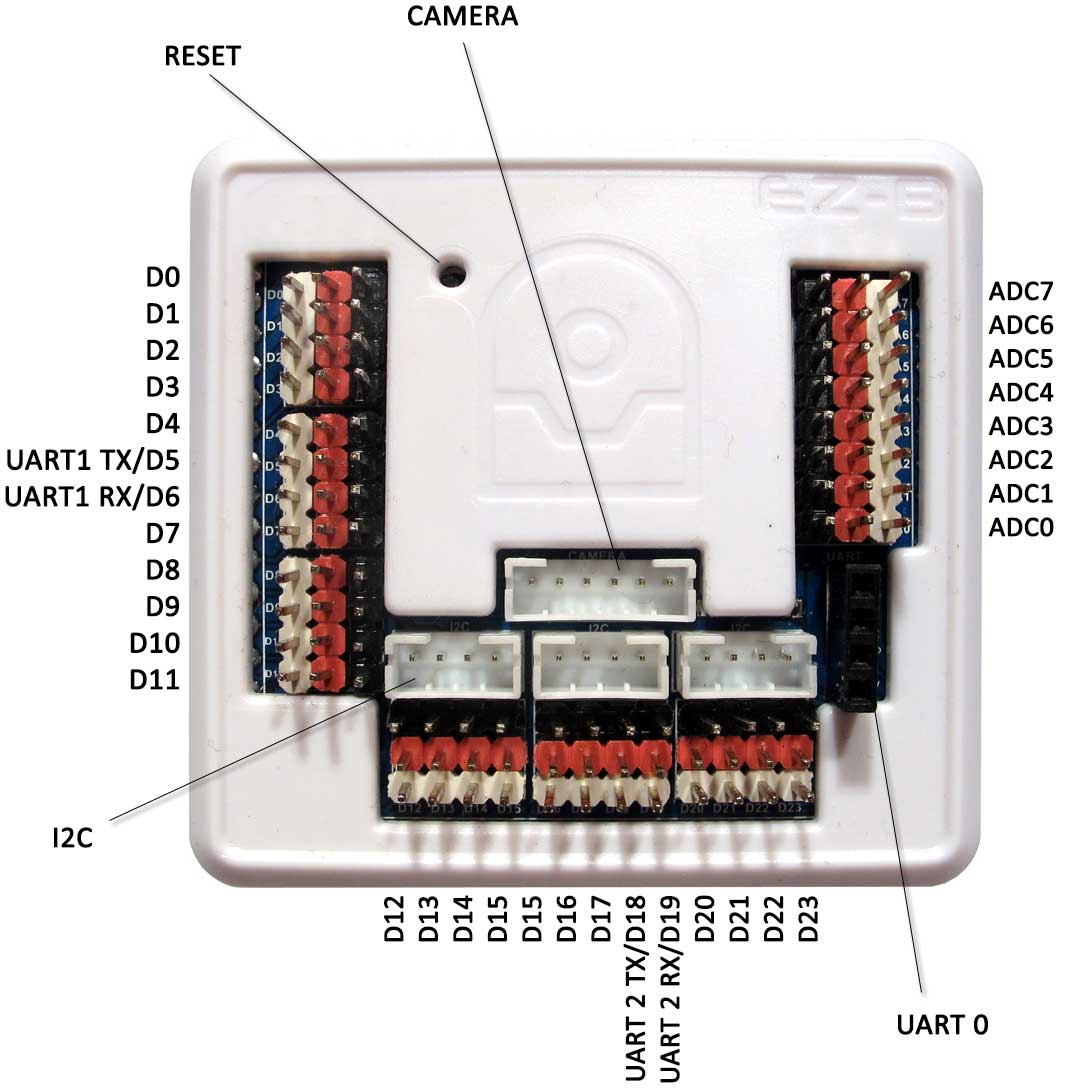
The EZ-B v4 has 24 digital ports (D0–D23), 8 analog ports (A0–A7), 3 UARTs, 3 I²C headers, a camera connector and a reset button (press it with a small pin).
Ports are not all the same. Digital ports send and read control signals, analog ports measure a voltage, and I²C and UART ports speak communication protocols. A device in the wrong type of port may not work, and can be damaged if the power on that port does not match what it expects.
3-pin GVS connectors. Most ports have three pins: Ground, Voltage (power) and Signal. Ground and Voltage power the device; Signal is the wire the EZ-B reads or writes, such as a servo's position command. On most servos the black or brown wire is ground: line it up with the black side of the port. A device plugged in backwards may not work or may be damaged.
| Port | Connector | Power on the V pin | What it does |
|---|---|---|---|
| Digital D0–D23 | 3-pin GVS header | Unregulated: the battery voltage (Vin) | Servos, PWM, digital output (0 V or 3.3 V), digital input (5 V tolerant) and transmit-only serial. A 330 Ω resistor limits each signal pin to about 10 mA. |
| Analog A0–A7 | 3-pin GVS header | Regulated 3.3 V | Read 0–3.3 V (5 V tolerant) as 8-bit (0–255) or 12-bit (0–4095) values. |
| I²C × 3 | 4-pin 2 mm JST-PH; GND, 3.3V, SDA, SCL (left to right) | Regulated 3.3 V | Smart sensors, displays and modules. 100 kHz by default, configurable up to 400 kHz. |
| UART0 (expansion) | 4-pin 2.54 mm female header, bottom right; TX, RX, GND, 3.3V (top down) | Regulated 3.3 V | Hardware serial up to 3.75 Mbaud with a 5 kB receive buffer. |
| UART1 | D5 (TX), D6 (RX) | Unregulated (digital ports) | Hardware serial with a 5 kB receive buffer. D5 can also drive Dynamixel servos. |
| UART2 | D18 (TX), D19 (RX) | Unregulated (digital ports) | Hardware serial with a 5 kB receive buffer. |
| Camera | 6-pin 2 mm JST-PH; CTS, RTS, TX, RX, GND, 3.3V (left to right) | Regulated 3.3 V | EZ-Robot Camera (v2), on its own 3.33 Mbps channel. Also used for the USB serial connection (see below). |
| Speaker (SPKR) | 2 pins | – | Amplified audio, 0.3 W maximum. Use an 8 Ω 0.5 W speaker (one is included when bought from EZ-Robot). |
| Reset button | Pinhole | – | A momentary press restores the default access point network settings. |
UART serial devices
UART ports talk to TTL serial devices in both directions: motor controllers, GPS units, smart servos or another microcontroller. Each UART has a 5,000-byte receive buffer and runs from 1 to 3,750,000 bps. Always cross the data lines: EZ-B TX to the device's RX, EZ-B RX to the device's TX, and connect the grounds together.
- ARCx (JavaScript):
UART.initHardwareUart(),UART.hardwareUartWrite(),UART.hardwareUartRead(),UART.hardwareUartAvailable(), or the UART blocks in Blockly. - ARC (EZ-Script):
UARTInit(),UARTWrite(),UARTRead(),UARTAvailable().
Status LED and sounds
The RGB LED on the top board and the voice prompts from the speaker tell you what the EZ-B v4 is doing. The board speaks on start-up, on a successful or failed network connection, and when the battery is low.
| The LED does this | It means |
|---|---|
| Flashes purple, green, white, then keeps flashing blue | Started up in access point (AP) mode, waiting for a connection |
| Solid blue | Synthiam software is connected in AP mode |
| Flashes blue, white, green, then keeps flashing green | Joined your Wi-Fi network in client mode |
| Flashes blue, white, green, then keeps flashing red | Could not join your Wi-Fi network in client mode |
| Solid green | Synthiam software is connected in client mode |
| Flashing aqua blue | Firmware is being updated |
| Flashing yellow | Resetting to default settings |
Access point mode or client mode
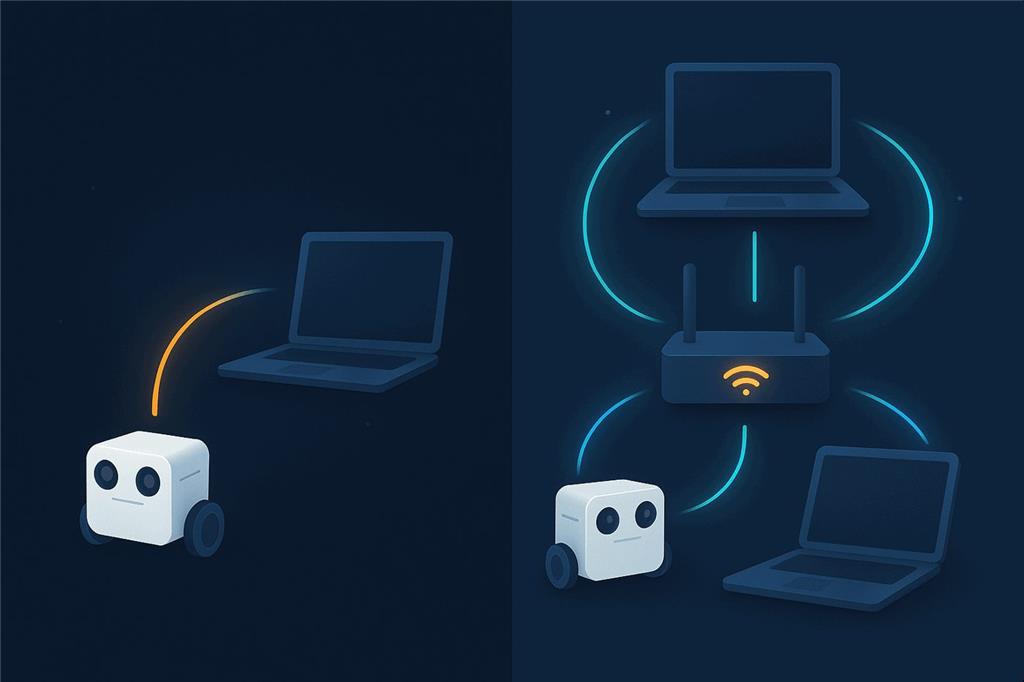
AP mode (direct connect) – start here
The EZ-B creates its own Wi-Fi network and your computer joins it. This is the default after a factory reset and works anywhere, with no router.
Your computer loses internet access while it is joined, unless it has a second network adapter. The board is at 192.168.1.1.
Client mode (join your Wi-Fi)
The EZ-B joins your home, school or office network like any other device. Your computer keeps its internet, and several devices can reach the robot. You need the network's credentials, and the board gets an address from your router; the EZB scanner in ARCx and ARC finds it for you.
Switch modes in the board's web configuration page. With factory settings, join the EZ-B's Wi-Fi network and open http://192.168.1.1
(use http, not https; the web server does not use SSL). In client mode, browse to the address your router gave the board. The page also sets the Wi-Fi
security (WPA2, WPA or WEP), the broadcast channel (1–11; 1, 6 or 11 are recommended), the battery monitor and the serial option. A Telnet interface is available too.
Web configuration (AP mode):  http://192.168.1.1
Telnet (AP mode):             telnet 192.168.1.1 8080
EZB connection port:          23   (192.168.1.1 or 192.168.1.1:23 in Ezb Connection)
Camera port:                  24   (192.168.1.1 or 192.168.1.1:24 in Camera Source (ezb))
To go back to defaults, press the reset button momentarily while the board is powered. All network settings return to AP mode.
Connecting over USB serial
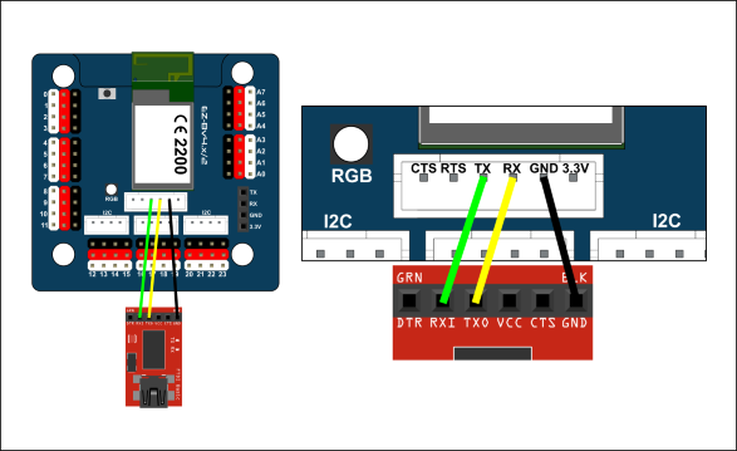
A USB-to-TTL serial adapter wired to the camera port connects a computer straight to the EZ-B v4, bypassing Wi-Fi. It helps where there is a lot of wireless interference, or when the computer is mounted in the robot.
| EZ-B v4 camera port | USB serial adapter |
|---|---|
| TX | RX |
| RX | TX |
| GND | GND |
- Join the EZ-B's Wi-Fi and open
http://192.168.1.1. On the Advanced tab set the serial baud rate (the fastest your adapter supports, up to 921600) and save. The EZ-B restarts. - In ARCx, open the Ezb Connection configuration, select the board, and set the same Baud rate under Connection.
- Enter the adapter's port (
COM3on Windows,/dev/ttyUSB0on Linux) as the address and connect. In ARC, pick the COM port in the connection control.
Good to know
- The camera does not work while serial is enabled, and over Wi-Fi the board then only offers its web page and Telnet.
- There is no connect chime over serial.
- Over serial the board may identify as EZ-B v4.x/1 (Comm 1) because the link bypasses the Wi-Fi module. This is expected.
- Use a short cable (about 15–30 cm), ideally shielded or with TX/GND and RX/GND twisted together. A firmware update may be needed on older boards.
- To return to Wi-Fi, turn serial off on the web page or press the reset button.
Eyes and a voice
EZ-Robot Camera (v2)
The camera plugs into the dedicated camera port with a 6-pin cable. The connector is keyed so it only fits one way: if it does not slide in easily, check the alignment rather than forcing it.
In ARCx, add Camera Source (ezb), pick the camera from the address list (or type the board's address; port 24 is the default) and press Start. It reconnects on its own if the link drops. Its window title is the video source name that Face Tracking, Color Tracking, recording and AI skills use. In ARC, use the Camera Device skill.
Speaker and sound
The amplified speaker output is rated 0.3 W; use an 8 Ω 0.5 W speaker on the SPKR pins. A non-amplified signal from the processor's DAC is on an exposed pad in the audio area; only use it if you know what you are doing, because it connects straight to the microcontroller.
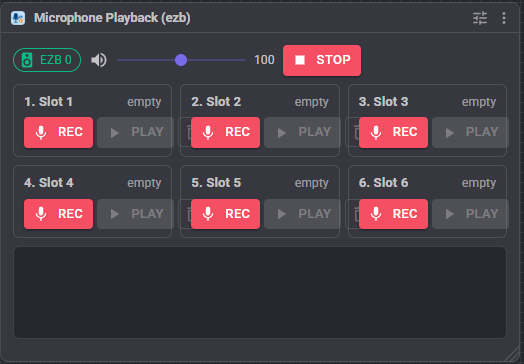
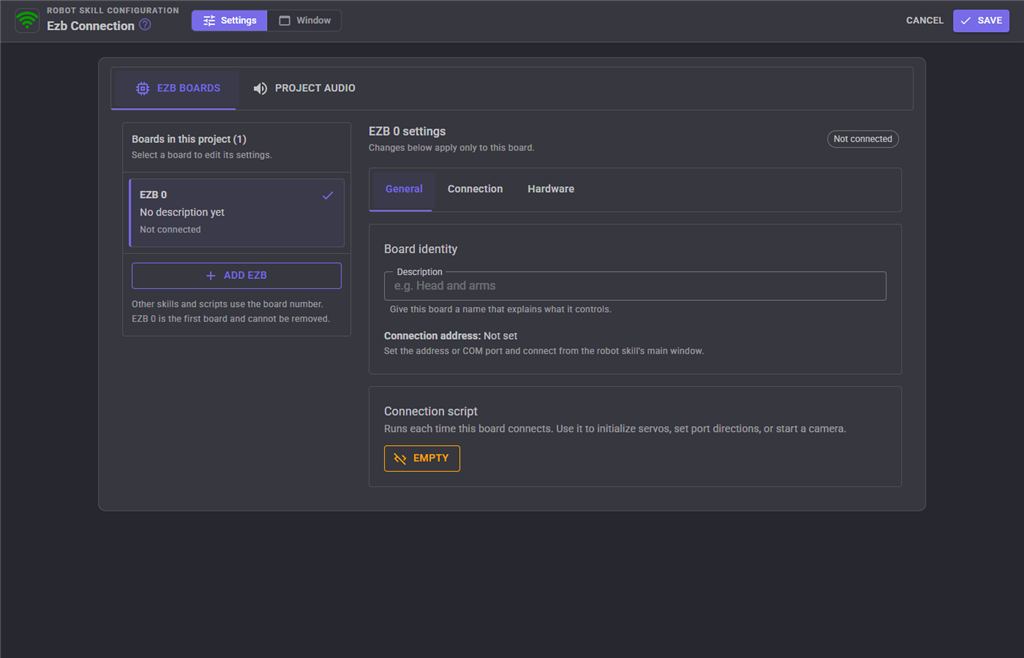
In ARCx, open the Ezb Connection configuration, choose Project audio and set Play audio through to EZB speaker: every robot skill's speech and sound then comes out of the robot. Microphone Playback (ezb) records your own voice into slots and plays them from the robot. In ARC, use SoundBoard (EZB) and the EZB speech commands.
Read this before plugging anything in
Power is where most beginners run into trouble. The EZ-B v4 runs on 4.5–16 V, but your servos and sensors probably do not.
Digital port power is unregulated
The V pin on every digital port (D0–D23) carries the battery voltage, not a regulated 5 V or 3.3 V. Power the board from 12 V and those pins output 12 V, which can destroy 5 V or 6 V devices. EZ-Robot servos should not be powered above 7.4 V. Use an inline regulator for third-party parts that need a different voltage.
Regulated 3.3 V ports: ADC, I²C, camera and UART0 expansion.
Practical power tips
- Servos draw a lot of current. If the robot resets or disconnects when it moves, the battery is sagging.
- Fuse it. The digital power pins are not protected; EZ-Robot recommends a 20 A (or lower) ATM automotive fuse between the battery and the board.
- Start small: test one servo, then add more.
- The included rechargeable AA battery holder is a safe choice for EZ-Robot servos.
Low battery monitor. The board protects LiPo batteries. It is on by default with a 7 V threshold for a 2S LiPo. Below that, the EZ-B repeats a spoken low battery warning and its ports stop responding until the battery is charged. If you use a different battery or a power adapter, change or turn off the monitor in the board's web configuration (permanent), in ARCx under Ezb Connection > EZB boards > Hardware (Enable battery monitor and Warning voltage), or in ARC's connection settings. Keep it on with LiPo batteries.
Electrical characteristics
| Parameter | Min | Typ | Max | Unit | Note |
|---|---|---|---|---|---|
| Voltage input (Vin) | 4.5 | 7.4 | 16 | V DC | Typ = 2-cell (2S) LiPo |
| Regulated supply (Vcc) | 3.2 | 3.3 | 3.4 | V DC | |
| Vin continuous current | 0.008 | 1.3 | 5 | A | Typ = 8 servos |
| Vin current spikes (fuse protected) | 0 | 5 | 20 | A | Typ = 8 servos |
| Vcc continuous current | 0 | 0.18 | 1 | A | Typ = EZ-B v4 + camera |
| Vcc current spikes | 0 | 0.4 | 3 | A | Typ = EZ-B v4 + camera |
| Vin low battery warning | OFF | 7 | 16 | V DC | Default 7 V for 2S LiPo |
| Current draw, no peripherals | 70 | 80 | 90 | mA | At 7.4 V, connected |
| Current draw with camera | 140 | 150 | 160 | mA | At 7.4 V, camera on |
| Digital input high | 1.6 | 3.3 | 5 | V DC | 5 V tolerant, high above 1.6 V |
| Digital input low | 0 | 0 | 1 | V DC | Low below 1 V |
| Digital output level | 0 | 3.3 | 3.3 | V DC | Regulated to Vcc |
| Digital port power pin | 0 | 7.4 | 16 | V DC | Unregulated, follows Vin |
| ADC input | 0 | 3.3 | 3.6 | V DC | 5 V tolerant |
| ADC power pin | 3.2 | 3.3 | 3.4 | V DC | Regulated to Vcc |
| I²C signal level | 0 | 3.3 | 5 | V DC | 5 V tolerant |
| I²C power pin | 3.2 | 3.3 | 3.4 | V DC | Regulated to Vcc |
| Camera signal level | 0 | 3.3 | 5 | V DC | 5 V tolerant |
| Camera power pin | 3.2 | 3.3 | 3.4 | V DC | Regulated to Vcc |
Vin is the battery or DC supply voltage minus the input diode's drop (0.14–0.36 V, depending on current). Vcc is the 3.3 V from the on-board switching regulator. Digital I/O reads or outputs 0 V (low) or 3.3 V (high). ADC converts a 0–3.3 V input to a number. I²C is a two-wire bus (SDA and SCL) shared by several devices. Do not mix 5 V and 3.3 V devices on the I²C bus: 5 V pull-ups can damage the 3.3 V parts. Source: EZ-Robot EZ-B v4 datasheet.
Move your first servo with ARCx
- Power the EZ-B safely. Use a battery voltage your servos and accessories can handle (see Power above). The board plays a start-up sound and the LED flashes blue.
- Join the EZ-B's Wi-Fi. On the computer that will run ARCx, connect to the EZ-B's network (AP mode). Later you can switch the board to client mode so the robot, the ARCx computer and your phone or tablet are all on your own network.
- Install ARCx on that computer: Windows 10/11, Ubuntu 24.04 or a Raspberry Pi running Ubuntu 24.04. Download ARCx, start it and open it in a browser.
-
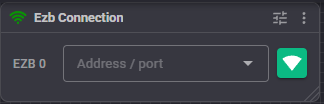
Add the Ezb Connection robot skill from the Communication category. Type or pick the board's address and press the green connect button.
192.168.1.1 (AP mode) 192.168.1.50 (client mode: the address your router gave it) COM3 / /dev/ttyUSB0 (USB serial adapter) - Move a servo. Plug a servo into D0 with the ground wire on the black side, add the Servo skill, choose D0 and drag the slider slowly at first.
- Add the camera and a voice. Add Camera Source (ezb) and press Start, then set Project audio to EZB speaker so the robot talks. From here, add sensors, movement panels, tracking and AI.
Using ARC on Windows instead? Join the EZ-B's Wi-Fi, open ARC, enter 192.168.1.1 in the EZB Connection skill and press Connect.
Both work. ARCx is recommended.
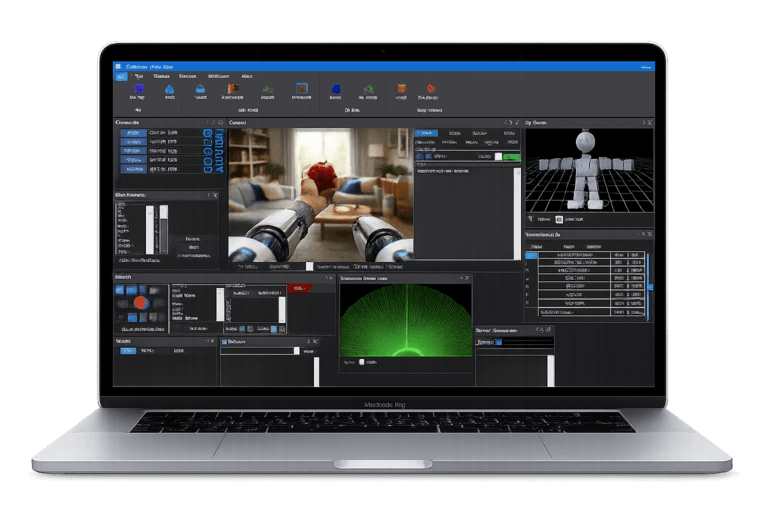
The EZ-B v4 is fully supported by both Synthiam platforms. Start new robots in ARCx; keep existing ARC projects in ARC if you prefer.
| ARCx Recommended | ARC | |
|---|---|---|
| Runs on | Windows 10/11 x64, Ubuntu 24.04 x64 and ARM64, including Raspberry Pi 4/5 | Windows |
| User interface | Any web browser on the network, several people at once; closing the browser leaves the robot running | Windows desktop application |
| Connect over | Wi-Fi, USB serial, or the board calling in | Wi-Fi or USB serial |
| Camera and speaker | Camera Source (ezb), Microphone Playback (ezb), project audio to the EZB speaker | Camera Device, SoundBoard (EZB), EZB speech |
| AI agents | Built-in MCP server: Claude and other agents can see, drive and program the robot | Through robot skills |
| Connection skill | Ezb Connection | EZB Connection |
Inside the EZ-B v4
The EZ-B v4 rollout video explains the design in detail, including the E-01 EZ-B v4 main board and E-15 EZ-B v4 Wi-Fi board reference designs. The top (E-15) board holds the communication processor and Wi-Fi antenna; the bottom (E-01) board holds the I/O processor that runs the ports and the start-up audio.
When something does not work
http://, not https://.
Try a different browser, or power-cycle the EZ-B and try again.
- Reseat the cable at both ends; a loose connection is the most common cause.
- Check for bent pins or damage near the connectors, and avoid sharp bends at the plugs, which break wires inside over time.
- If USB serial is enabled on the board, the camera is turned off. Disable serial on the web page to use the camera.
- A falling frame rate before a disconnect usually means weak Wi-Fi or interference: move closer to the access point or change channel.
The EZ-B v4 has two boards that start together. The top board holds the communication processor and Wi-Fi antenna; the bottom board holds the I/O processor that runs the ports and the start-up audio. On power-up, the communication processor starts first and sends start-up commands to the I/O processor; once it answers, the start-up sound plays.
A missing start-up sound is rarely the speaker. Usually it means the I/O processor is not responding. When software connects, the communication processor accepts the connection and does the first EZB protocol handshake, then asks the I/O processor for its firmware ID. If the connection log stops at that request and no ID comes back, the bottom board is not answering.
The camera can still work in this state, because the top board handles the video stream. A working camera only proves the communication board is alive.
The usual cause is electrical damage to the I/O system: shorted or overloaded I/O pins, or too much voltage or current on them. The I/O protection has limits.
Frequently asked questions
Servo.setPosition(D0, 90, 1) moves D0 on board 1.
EZ-B v4, IoTiny and Arduino or ESP boards running EZB firmware can be mixed in one project.
Bring your EZ-B v4 robot to life
Install ARCx, add Ezb Connection, and control your robot from any browser in minutes.
wil there be a connection for a speaker in the future?similar like the iotiny.:D
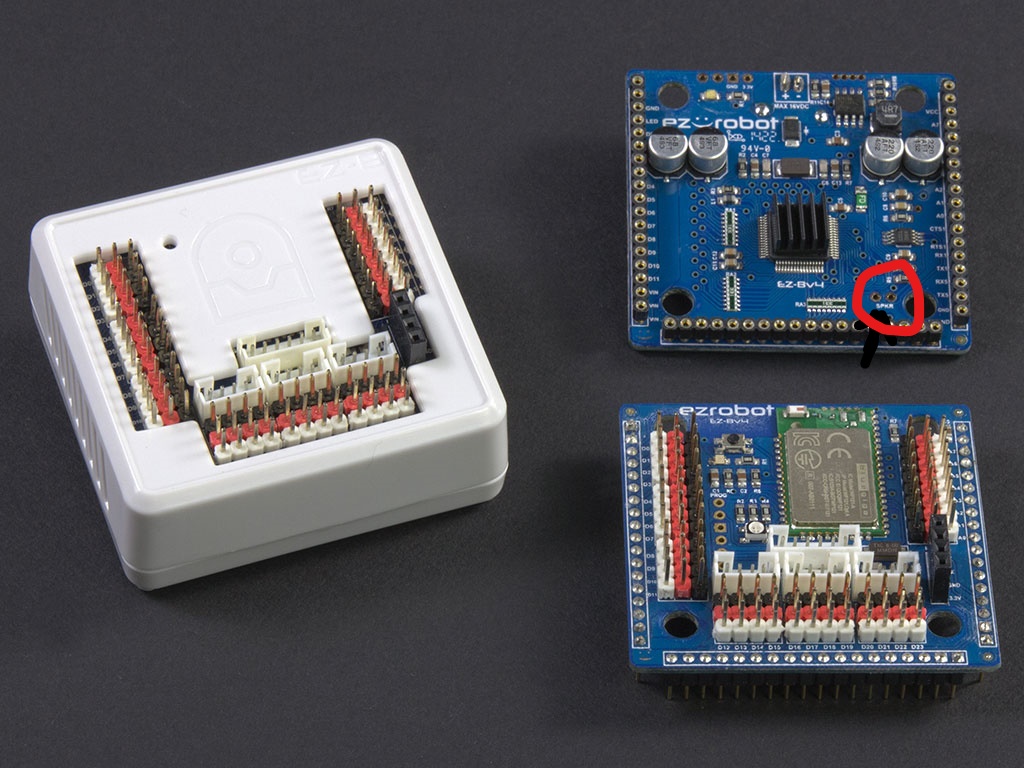
Nomad, What I did was, on the Bottom Board I soldered wires on the pads marked speaker. Then connect that to a speaker or if you need it louder to a small amplifier. See the picture for the locationhi rz90208
i know this .but that wasn my question.thanks you for your rspond do.
happy new year
Sorry to post when the answer is somewhere, but with the split between the two websites I have difficulty finding some stuff. Can someone point me to the write up on adding a SSID to the EZBs? ALAN and ALENA are set up with the direct connection to the computer, but I still see the EZBs wifi broadcasting on my networks. I would like to lock them up with a SSID so at CES no one can connect to them...thanks in advance.
The eZrobot products have their own tutorials on the ezrobot website. This is not support for ezrobot products.
It’s not a split between websites. Ezrobot has products and their products are supported on that website. Use the website for the manufacturer, which is ezrobot.
Visit the ezrobot website and view the learn section to learn how to use the ezrobot products.
Or, you know, you could just post the link.... https://synthiam.com/Community/Tutorials/116?courseId=4
Then I am lost as ever as to what Synthiam is all about. So to clarify, Synthiam is software only? Has ARC been rebranded Synthiam? All the questions here are only software related? All hardware "products" belonging to EZ Robot are "their" domain to support? Along with the EZ Robots website that will support how the hardware works/videos and manuals?
@Alan, thank you found it and got the SSID figured out.
Not A question but some info Hobbyking has [color=#000000][size=3][font=Roboto, sans-serif]EZ-B V4 WIFI ROBOT CONTROLLER $49.99 tthis is great price for a fantastic piece of equiptment.