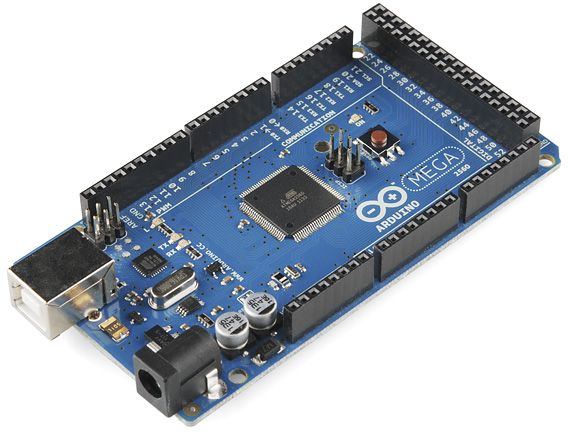
Arduino Due/Mega by Arduino
Firmware
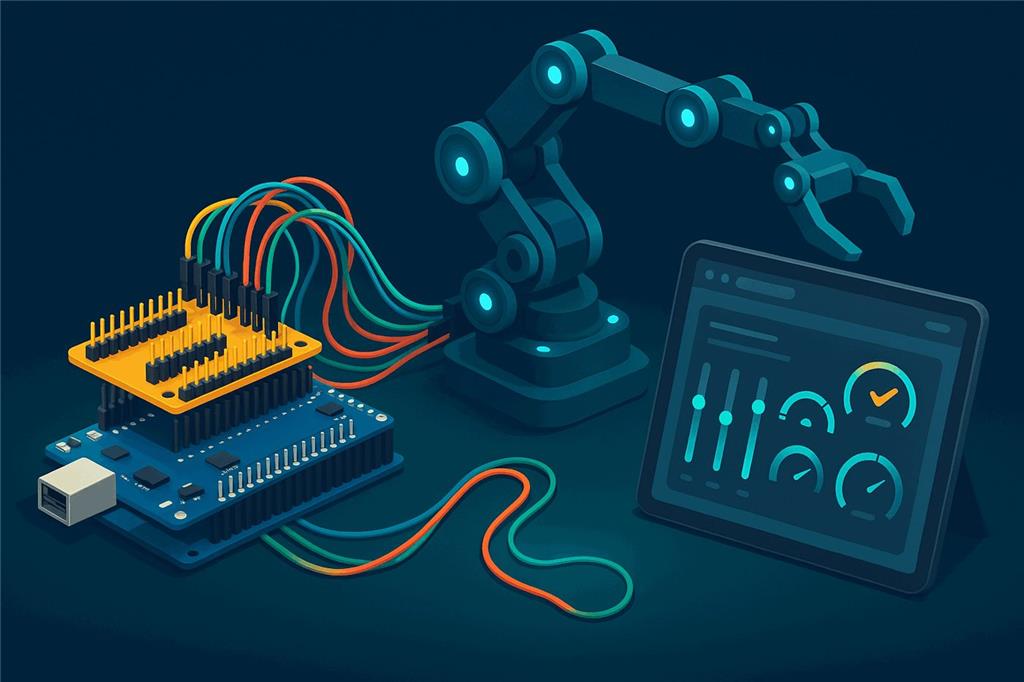
Lots of pins for big robots
With Synthiam's EZB firmware, an Arduino Mega 2560 becomes a capability controller with 24 servo outputs, 13 PWM outputs, 21 digital ports, 8 analog inputs and three extra hardware serial ports, all driven from ARCx in a web browser over a single USB cable.
How the Mega works with Synthiam.
Upload the EZB-Arduino-Mega firmware (in the Firmware section below) to the Mega once with the Arduino IDE.
The Mega then speaks the EZB protocol over USB, and ARCx's Ezb Connection robot skill connects to its serial port
(COM3 on Windows, /dev/ttyACM0 or /dev/ttyUSB0 on Linux). ARC connects the same way with its EZB Connection skill.
You do not write Arduino sketches for each project: robot skills, Blockly and scripts do the work.
We recommend ARCx, which runs on Windows, Ubuntu and Raspberry Pi and is used from any web browser.
What is the Arduino Mega 2560?
The Arduino Mega 2560 is a high-I/O microcontroller board for robotics and automation projects. It stands out for its large number of pins, multiple hardware UARTs and 5 V sensor compatibility.
With the EZB firmware, ARC and ARCx can operate all of these at the same time:
- 8 ADC (analog) inputs
- 13 PWM outputs
- 21 digital I/O ports
- 24 servo outputs
- 3 hardware UARTs for GPS, RFID, motor controllers and other serial modules
That makes the Mega suitable for complex robots with many sensors, actuators, indicators and serial modules, all coordinated through the robot skills, scripts and AI in ARCx or ARC.
Arduino Mega at a glance
| Type | Microcontroller board (DIY EZB with Synthiam firmware) |
|---|---|
| Maker | Arduino |
| Microcontroller | ATmega2560 |
| Connection | USB (serial) |
| Power | USB or barrel jack |
| EZB resources | 24 servos, 13 PWM, 21 digital, 8 ADC, 3 UARTs |
| Synthiam uses it for | Robots with many servos, sensors and serial devices |
| Website | store.arduino.cc |
What you can do with a Mega in Synthiam
24 servos
Animatronics, robot arms, pan/tilt systems and legged robots. Pose and animate them with Auto Position, Servo Animation and Servo Pad.
13 PWM outputs
Speed control, LED dimming, fans and ESCs. Drive motors through an H-bridge with the Hbridge Movement Panel or set duty with the Pwm Slider.
21 digital ports
Relays, switches, LEDs and logic signals, with software serial transmit for simple UART modules. Watch and toggle them in Digital Monitor.
8 analog inputs
Potentiometers, distance sensors, light sensors, force sensors and more, read in Adc Monitor, charted in Ez Chart, or used from scripts.
3 hardware UARTs
Talk to GPS receivers, RFID readers, motor controllers and smart servos with buffered receive. Scripts use the hardware UART commands, such as UART.hardwareUartWrite().
Ultrasonic sensors
The firmware reads HC-SR04 ultrasonic distance sensors. Read one from a script with Ping.get(trigger, echo), or in ARC with the Ultrasonic Distance skill.
Blockly, JavaScript, Python
Program every port in the Script robot skill without reflashing the Mega.
Joysticks and Custom UI
Drive with an on-screen Movement Joystick or a gamepad, and build touch control screens with Custom UI.
AI agents
ARCx is an MCP server, so AI agents like Claude can see, move and program a Mega robot through its robot skills.
EZB port to Mega pin mapping
On the Mega, EZB port numbers are not the same as the Arduino pin numbers, and the mapping depends on what the port is used for. Wire each device to the pin listed for its job.
Use the map for the job. The servo, PWM and digital tables are separate maps. For example, a servo on D0 plugs into pin 22, a PWM output on D0 uses pin 2, and a digital output on D9 is pin 11 while a PWM output on D9 is pin 13.
Digital I/O and PWM outputs
ARC supports up to 24 digital I/O ports; the Mega exposes 21, mapped as D0–D20. These drive relays, switches, LEDs and logic signals, and also support software serial transmit for simple UART modules. The 13 hardware PWM channels (speed control, dimming LEDs, fans, ESCs) are mapped as D0–D12.
| EZB port | Digital I/O pin | PWM pin |
|---|---|---|
| D0 | 2 | 2 |
| D1 | 3 | 3 |
| D2 | 4 | 4 |
| D3 | 5 | 5 |
| D4 | 6 | 6 |
| D5 | 7 | 7 |
| D6 | 8 | 8 |
| D7 | 9 | 9 |
| D8 | 10 | 10 |
| D9 | 11 | 13 |
| D10 | 12 | 44 |
| D11 | 13 | 45 |
| D12 | 44 | 46 |
| D13 | 45 | — |
| D14 | 46 | — |
| D15 | 62 (A8) | — |
| D16 | 63 (A9) | — |
| D17 | 64 (A10) | — |
| D18 | 65 (A11) | — |
| D19 | 66 (A12) | — |
| D20 | 67 (A13) | — |
Servo outputs
Up to 24 servo outputs are exposed using the Mega's Servo library.
| EZB servo port | Mega pin |
|---|---|
| D0 | 22 |
| D1 | 23 |
| D2 | 24 |
| D3 | 25 |
| D4 | 26 |
| D5 | 27 |
| D6 | 28 |
| D7 | 29 |
| D8 | 30 |
| D9 | 31 |
| D10 | 32 |
| D11 | 33 |
| D12 | 34 |
| D13 | 35 |
| D14 | 36 |
| D15 | 37 |
| D16 | 38 |
| D17 | 39 |
| D18 | 40 |
| D19 | 41 |
| D20 | 42 |
| D21 | 43 |
| D22 | 68 (A14) |
| D23 | 69 (A15) |
Analog inputs (ADC)
ARC and ARCx read up to 8 analog inputs on the Mega, mapped as ADC0–ADC7.
| EZB port | Mega pin | EZB port | Mega pin |
|---|---|---|---|
| ADC0 | A0 | ADC4 | A4 |
| ADC1 | A1 | ADC5 | A5 |
| ADC2 | A2 | ADC6 | A6 |
| ADC3 | A3 | ADC7 | A7 |
Hardware serial ports
The firmware's three hardware UARTs are the Mega's extra serial ports. Its first serial port (pins 0 and 1) is the USB link to the computer, so leave it alone.
| Mega serial port | TX pin | RX pin |
|---|---|---|
| Serial1 | 18 | 19 |
| Serial2 | 16 | 17 |
| Serial3 | 14 | 15 |
The (A8)–(A15) labels in the tables are the Mega's analog header names for pins 62–69. Those pins are used here as digital and servo pins.
I/O expansion shield (recommended)
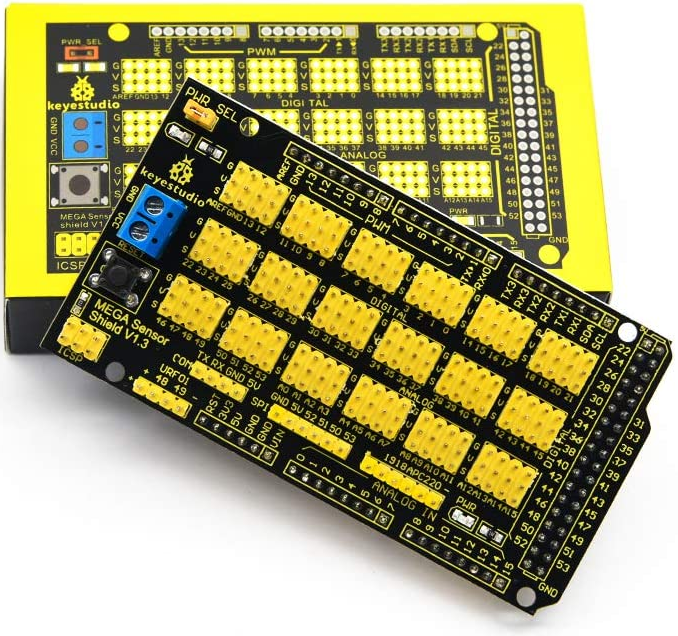
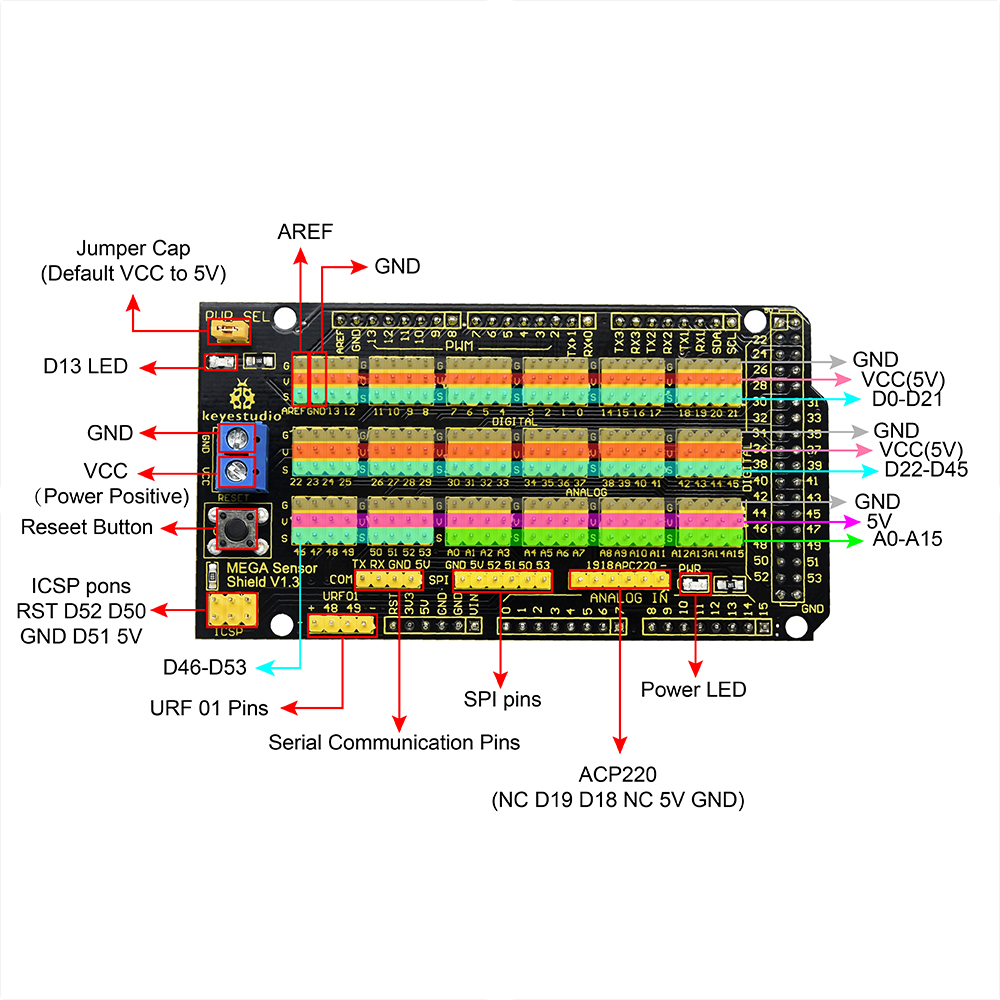
The Mega exposes raw pin headers. A sensor or servo shield adds a signal, voltage and ground pin beside every I/O pin, which makes wiring servos and sensors much easier and reduces cable strain.
A commonly used option is the KEYESTUDIO Mega Sensor Shield V1 for Arduino Mega 2560.
Servos can draw more current than the Mega's regulator or USB can supply. Power them from a separate supply sized for your servos, and connect its ground to the Mega's GND.
Connect a Mega to ARCx
- Download the firmware. Get EZB-Arduino-Mega from the Firmware section below and extract the zip to a folder.
-
Upload it with the Arduino IDE. Connect the Mega with a USB cable, open the
.inofile in the Arduino IDE, choose Tools → Board → Arduino Mega or Mega 2560 and the Mega's port, and press Upload. Write down the_BAUD_RATEvalue near the top of the sketch: ARCx must use the same baud rate. The firmware upload tutorial walks through it with pictures (it uses the Mega as its example). - Install ARCx on the computer the Mega is plugged into: Windows, Ubuntu or a Raspberry Pi running Ubuntu 24.04. Download ARCx.
-
Set the baud rate. Add the Ezb Connection robot skill (Communication category),
open its configuration, select EZB 0, open the Connection tab and set Baud rate to the firmware's
_BAUD_RATE. Save. -
Connect. Pick the Mega's serial port in the main window and press the green connect button.
Windows: COM3 (check Device Manager for the number) Linux: /dev/ttyACM0 (many clone boards: /dev/ttyUSB0) - Test. Add a Servo skill on D0 with a servo on pin 22, or toggle digital D11 (pin 13, the Mega's on-board LED) in Digital Monitor.
Using ARC instead?
Press Config on ARC's connection control, open Settings, set the baud rate for the EZB index you use for the Mega and save. Choose the Mega's COM port in the address box and press Connect. ARC lists the firmware's capabilities in its debug window.
Both work, ARCx is recommended
The Mega firmware speaks the standard EZB protocol, so it works with both of Synthiam's platforms. Start new robots in ARCx.
| ARCx Recommended | ARC | |
|---|---|---|
| Runs on | Windows 10/11 x64, Ubuntu 24.04 x64 and ARM64, Raspberry Pi 4/5 with Ubuntu 24.04 | Windows |
| User interface | Any web browser, several people at once; closing the browser leaves the robot running | Windows desktop application |
| Connection skill | Ezb Connection | EZB Connection |
| On-robot computer | A Raspberry Pi with Ubuntu 24.04 can carry ARCx and the Mega, controlled over Wi-Fi from a browser | Needs a Windows PC |
| AI agents | Built-in MCP server | Through ARC robot skills |
| Robot skill store | Both install robot skills from the Synthiam store | |
If something does not work
_BAUD_RATE in the firmware (ARCx defaults to 9600). Save, disconnect and reconnect after changing it.
If the Mega resets or never answers, try toggling Enable DTR and Enable RTS on the same tab.
dialout group, then log out and back in:
sudo usermod -aG dialout $USERFrequently asked questions
Servo.setPosition(d0, 90, 1) for the second board.
Put all of the Mega's pins to work
Upload the EZB firmware, install ARCx, add the Ezb Connection skill, and build a robot with dozens of servos and sensors.
@DJ,
yes and the plug in the barrel jack had 5vdc going to the Arduino mega.
So this time I unplugged power to the barrel jack and only had the USB cable plugged into my Arduino and my PC, no beeps.
So I’m at a loss. I my just cut the red power on the USB cable going to the pc. I hope to try this tomorrow if I have time to make sure ARC controls the Arduino with ARC firmware.
Thanks again DJ.
@DJ,
I did fined a copy of the mega firmware I downloaded a few weeks ago, but it does not support Ultrasonic sensors. Is this something you will be adding soon? Thank you. Also what port do I put sabertooth Movement Panel on.
thanks in advance Cheers
i'll add support for distance sensors for you. It'll be in the next update which I can probably do this weekend
choose whatever port you have the sabertooth connected to. It's up to you - connect it, select it and go . Use any digital port for bit-bang serial, or use the hardware uart. The option is selectable in the sabertooth Movement Panel configuration screen.
Thank you DJ. You’re awesome!
@DJ, you always take the time to add additions to your already awesome software for anyone that asks. That’s a great thing!
I’m not really sure how to connect the UARt for my sabertooth on the mega on the Arduino but I will look at the documents and try to figure it out.
I do have a question I ask a while ago about the Arduino DEU/Mega. Both board’s numbers only go as high to 53. Your port numbers go higher. I’m asking is you have numbers on the layout of the ADC, PWM, digital and analog. Is this of a future design/product Jeremie and company is working on?
also, here is a link for the mega sensor Shield V1 link for anybody who what’s info.. https://www.keyestudio.com/products/free-shipping-keyestudio-mega-sensor-shield-v1-for-arduino-mega
Description of the mega shield: Have you met with these troubles? when connecting a couple of sensor modules to MEGA 2560 control board, sometimes power output interfaces are not enough, so need to use the breadboard and the wiring is rather troublesome. Now don’t worry about that. You can use this keyestudio MEGA sensor shield. It is fully compatible with MEGA man 2560 control board, so that you can easily stack the MEGA sensor shield onto the MEGA 2560 control board. The shield comes with digital and analog interfaces in 3PIN (G V S), easy to connect the 3PIN sensor modules. Besides, it comes with communication pins of 2.54mm pin pitch, such as serial and SPI communication. It comes with a reset button and 2 signal indicators as well. Note: for the 3PIN interface, the voltage of Analog pins (labeled V) is 5V; while the voltage of Digital pins (labeled V) is VCC, that is, the voltage input via a blue terminal block, default by jumper connected, connecting the voltage to 5V on the shield.
Thanks again. CheersIf the port numbers go higher than your board, then you won't be able to use those pins. The pwm, servo, and digital ports are assigned to the capabilities of the chip on the mega.
@DJ,
I understand now, I need a Arduino Mega 2560 Rev3 to get the high pin outs. Sorry for being so dense.:( BTY, how is the ultrasonic sensor firmware coming along?
Thanks and Cheers!
The firmware is available for download on this page . scroll to the top and click download the latest firmware (sept 2021). However, it requires ARC to be updated. It's something I'm doing today
Merne, here is the correct link for sabertooth manual and discussion: https://synthiam.com/Support/Skills/Movement-Panels/Sabertooth-Movement-Panel?id=16039
You will find instructions to configure the robot skill and links to configure the dip switches on the device.